
REWIRE MUSIC THEORY
Learn
3.1 THE PIANO KEYBOARD
Understanding the keyboard is essential to understanding music theory. There are seven letters in the musical alphabet: A, B, C, D, E, F, and G. These notes are “natural” since they are neither sharp nor flat and are the white keys on the piano keyboard. Each black key is a half step above (sharp) or below (flat) a natural note.
Watch the walkthrough video.
Learn the information below.
Draw a keyboard!
anatomy of a keyboard
Half Step: The smallest distance in music.
Whole Step: Two half steps.
Accidental: A symbol that changes the pitch of a note by a half step. Accidentals go after the letter names of pitches and before note heads on the musical staff.
Flat: An accidental that lowers a note by a half step. The symbol for a flat is b (Db is a half step lower than D).
Sharp: An accidental that raises a note by a half step. The symbol for a sharp is # (C# is a half step higher than C).
Enharmonics: Two notes with different letter names that share the same pitch (C# and Db are enharmonically equivalent).
Root: The root of the chord is the same as the letter name of the chord.
Octave: Notes that share the same letter name that are a scale-length away. Notes that are an octave away vibrate at twice the speed.
how to draw
Let’s draw a keyboard!
Grab a piece of paper and follow along with the video.
Label the letter names of each black and white key.
Include both enharmonic names for the black keys.
Identify
*KEYBOARD
Use the flashcards to work on identifying the notes on the piano keyboard.
Practice
C POSITION
Place your left hand on the keyboard so that your fingers are on the corresponding notes shown on the chart. This is called C position.
Practice playing the notes in C position with your left hand. You can use a real piano or a Paper Piano →
Check your technique with the information below.
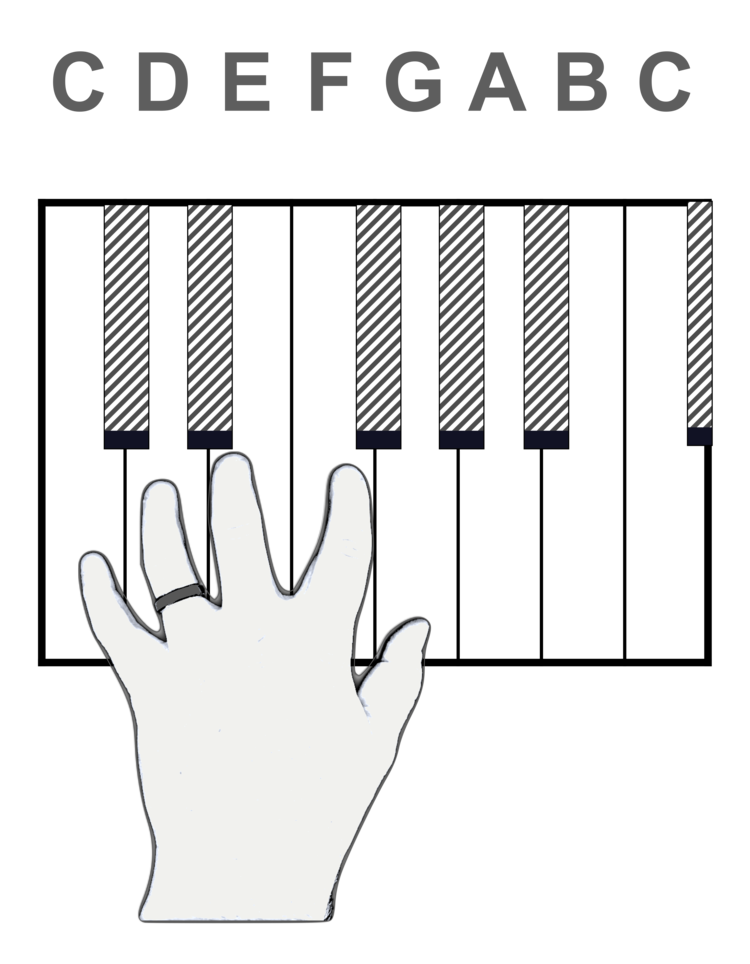

TECHNIQUE
Make sure you have good technique by getting into C position with your left hand starting with your pinky on low C and placing the rest of your fingers on adjacent keys. Check that you are:
1. Keeping your wrist relaxed and in a neutral position
2. Not buckling your knuckles while playing
3. Keeping your fingers close to the keys when they are not playing
4. Check your technique by playing along with the C Position Warmup →

Test
C POSITION ASSESSMENT
Demonstrate that you know the notes on the keyboard and can play them in C position with good technique.
Choose a random flashcard and turn on the metronome.
Say the letter name on one beat then play the corresponding note on the next.
Continue saying and playing the notes given on each flashcard along with the metronome.